 Save to everydaypinmeals
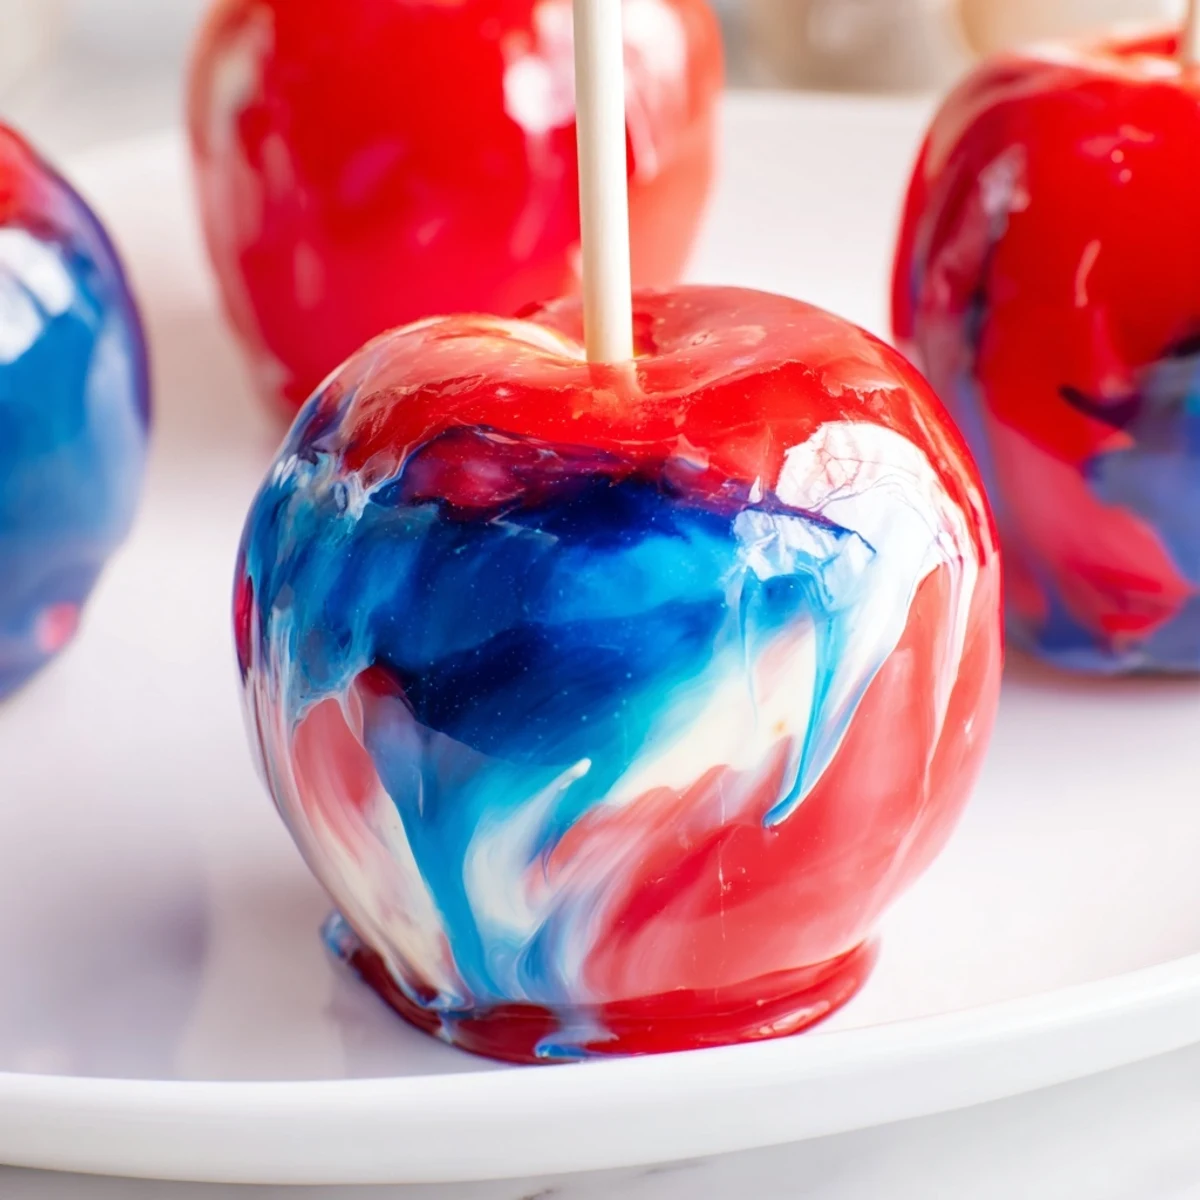
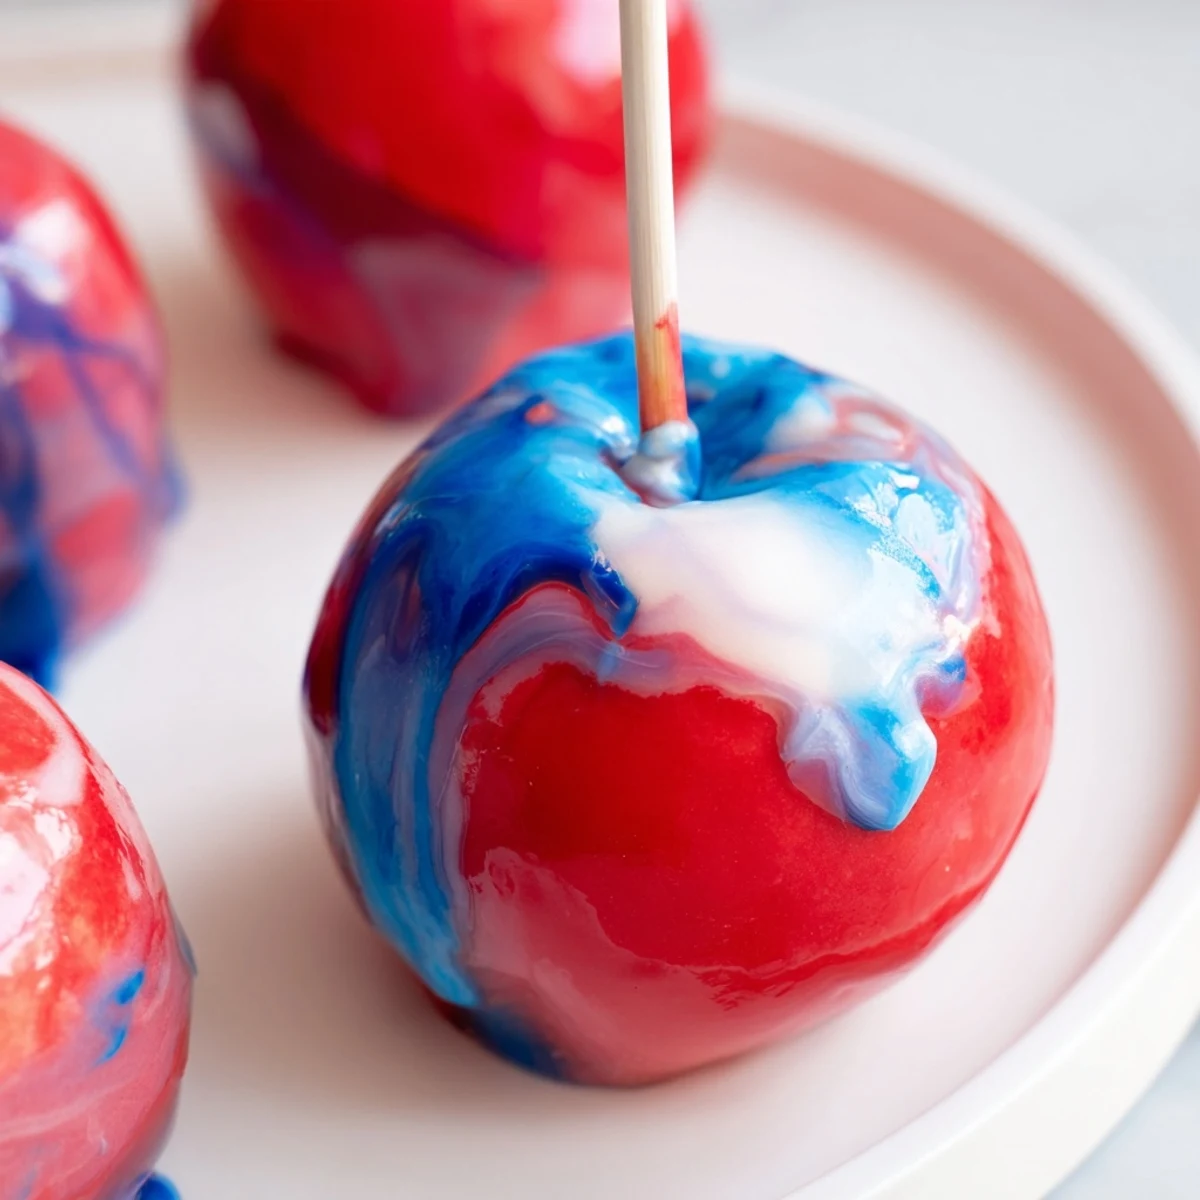
 These marbled candy apples feature crisp apples coated in a glossy, vibrantly swirled candy shell. The technique involves making a hard candy syrup and adding drops of different food colorings to create beautiful marbled patterns. The process requires a candy thermometer to reach the hard crack stage at 300°F, then gently swirling colors before dipping each apple for an even coat. The result is a visually striking dessert that's perfect for parties, holidays, or any whimsical dessert table.
The first time I attempted marbled candy apples was for my daughter's eighth birthday party. I was nervous about getting that perfect swirled effect without muddying the colors into brown. When I pulled that first apple from the candy pot and saw galaxies of red, white and blue dancing across the surface, I actually squealed loud enough to make my husband come running from the other room.
I made a batch for our neighborhood Halloween gathering last year, and I swear the kids gravitated toward these like moths to flame. One little boy told me it looked like a galaxy had exploded onto his apple, which might be the best description I have ever heard. Watching them line up to choose their favorite color pattern was unexpectedly delightful.
Ingredients
- 8 medium apples: Granny Smith or Fuji work beautifully because their tartness balances the intense sweetness and their firm flesh holds up well
- 8 sturdy wooden sticks: Bamboo skewers or craft sticks need to be thick enough they won't snap when you are turning heavy coated apples
- 2 cups granulated sugar: The foundation of your candy shell, so do not substitute with other sweeteners
- 3/4 cup water: Just enough to dissolve the sugar initially before it cooks off
- 1/2 cup light corn syrup: This prevents crystallization and gives your candy coating that perfect glassy shine
- 1/2 tsp vanilla extract: Optional, but I love the warm depth it adds to the sugary coating
- Red, blue and white gel food coloring: Gel coloring is essential here because liquid coloring will make your syrup seize up and turn grainy
Instructions
- Prep your workstation:
- Line a large baking sheet with parchment paper or a silicone mat and push wooden sticks into the stem end of each apple until they feel secure
- Make the candy base:
- Combine sugar, water and corn syrup in a heavy-bottomed saucepan over medium heat, stirring just until the sugar dissolves completely
- Reach hard crack stage:
- Turn the heat to high and let the syrup boil undisturbed until it hits exactly 300 degrees F on your candy thermometer
- Create the marble magic:
- Remove from heat, stir in vanilla if using, then add drops of each gel coloring and swirl gently with a skewer to create streaks
- Coat the apples:
- Dip each apple into the swirled syrup, turning to coat evenly and letting excess drip off before placing on your prepared sheet
- Let them set:
- Cool completely at room temperature for about 15 minutes until the candy shell hardens completely before serving
 Save to everydaypinmeals
 My sister-in-law asked me to teach her how to make these for her daughter's winter wonderland themed birthday. We spent a cozy afternoon in the kitchen making blue, white and silver marbled apples while snow fell outside. She still sends me photos whenever she makes them now.
Mastering the Marble
The secret to those gorgeous distinct swirls is barely touching your skewer to the surface of the hot syrup after adding the colors. If you overmix, you will end up with a muddy uniform color instead of those painterly streaks that make these apples so stunning.
Perfect Pairings
While these apples are showstoppers on their own, I love serving them alongside caramel apples for a stunning dessert table contrast. The glossy marbled next to the matte caramel looks absolutely gorgeous and gives guests options.
Make Ahead Magic
You can make these up to 24 hours in advance, which is a lifesaver when you are planning a party. Store them on the parchment-lined baking sheet at room temperature, uncovered.
- Avoid humidity or the candy coating will start to weep and lose its crunch
- If you want to package them individually, wrap in cellophane bags tied with ribbon
- Never refrigerate or the candy shell will develop condensation and become sticky
 Save to everydaypinmeals
 There is something so satisfying about hearing that satisfying crack when someone bites into these beautiful creations.
Recipe FAQs
- → What type of apples work best for candy coating?
-
Medium apples like Granny Smith or Fuji work best. They should be thoroughly washed and dried before dipping to ensure the candy coating adheres properly. The crisp texture holds up well to the candy shell.
- → How do I achieve the marbled effect?
-
Add a few drops of different gel food colorings to the hot candy syrup, then gently swirl with a wooden skewer. Don't fully mix - you want visible streaks for the marbled effect. Work quickly as the syrup sets fast at the hard crack stage.
- → What's the hard crack stage and why is it important?
-
The hard crack stage is 300°F (150°C), where the sugar syrup becomes hard and brittle when cooled. This temperature is crucial for creating a stable, non-sticky candy coating that will harden properly on the apples.
- → How long do the candy apples last?
-
Store finished apples at room temperature for up to 24 hours. The candy shell will harden completely as it cools, creating a protective layer around the apple.
- → Can I use different color combinations?
-
Absolutely! Try various color combinations for different occasions - festive red and green for holidays, pastels for spring, or bold colors for parties. Gel food coloring provides the most vibrant, distinct marbling.