 Save to everydaypinmeals
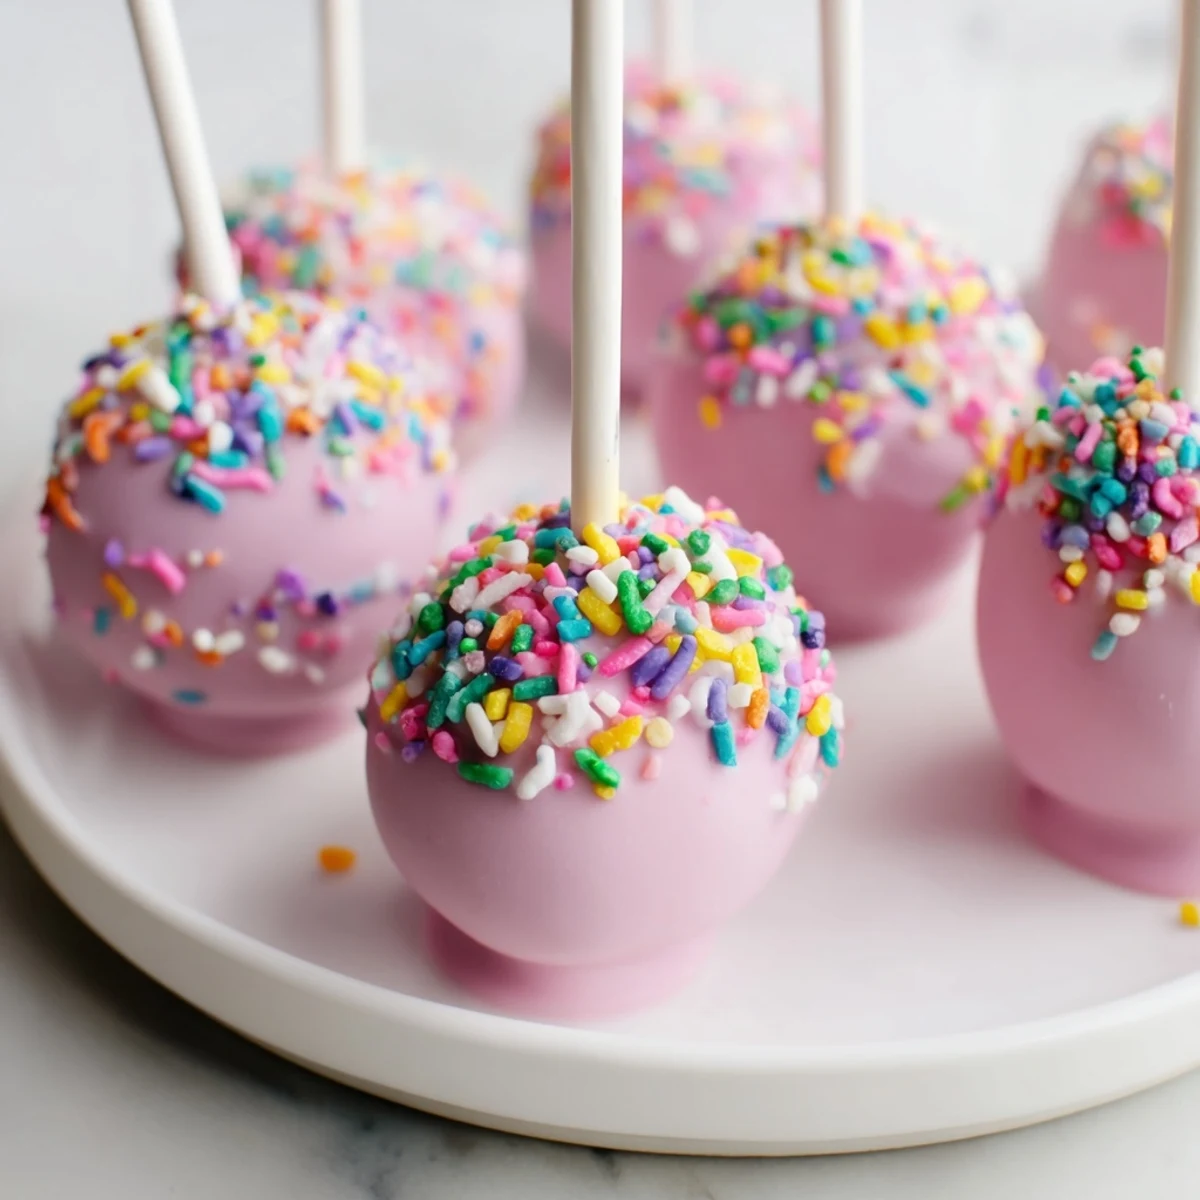
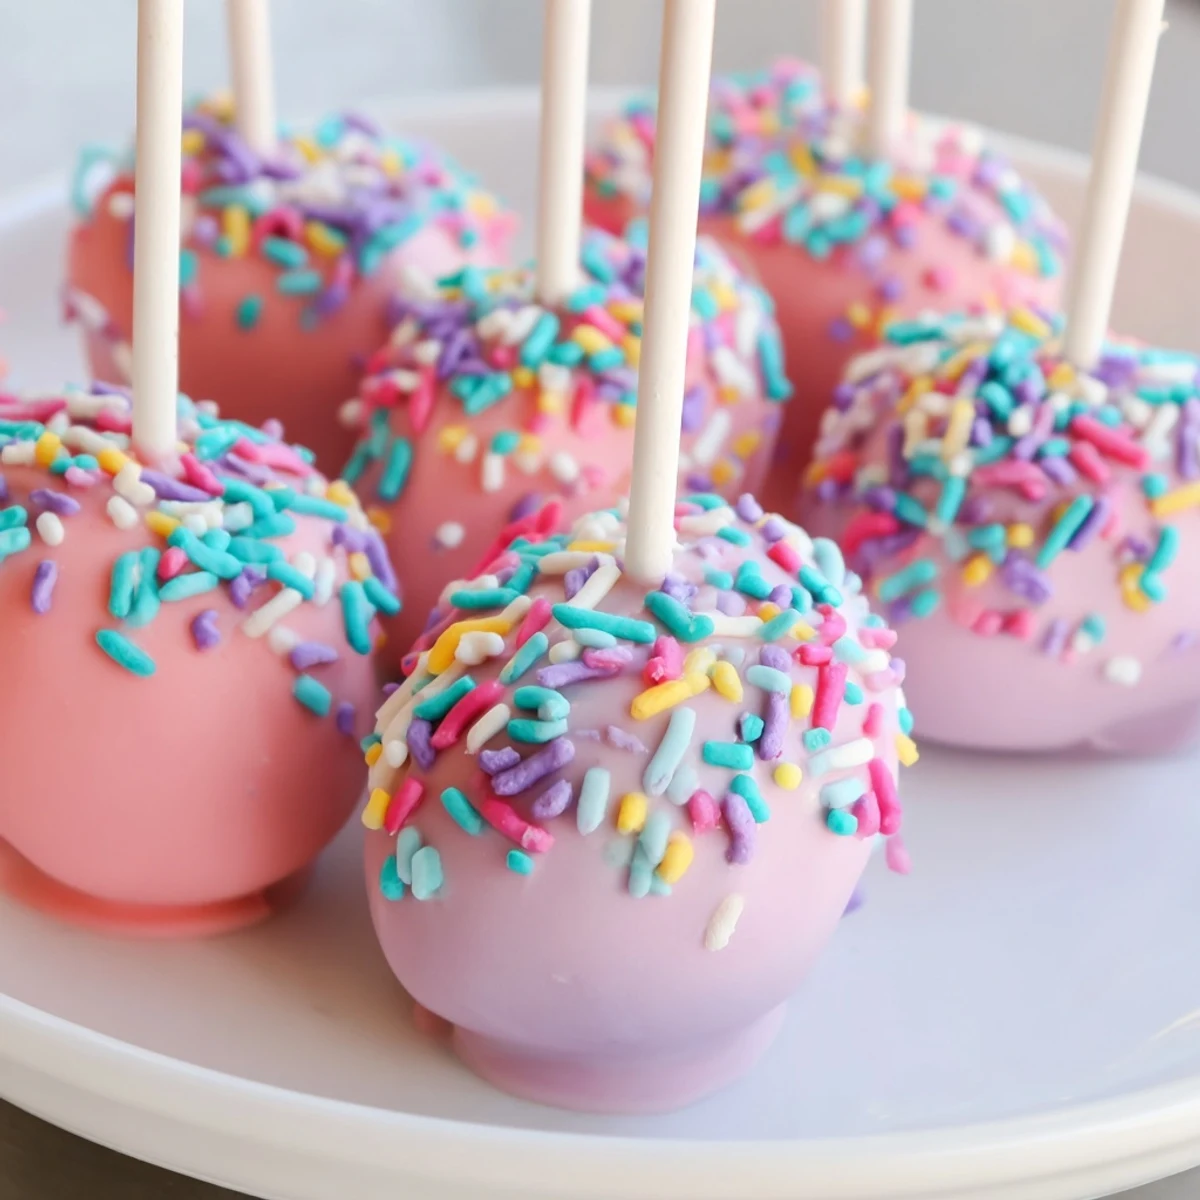
 These festive egg-shaped cake pops combine moist vanilla or funfetti cake crumbs with creamy frosting for a smooth texture. The mixture is shaped into oval eggs, chilled until firm, then dipped in silky chocolate coating mixed with vegetable oil for shine. Finally, they’re decorated with bright sprinkles for a playful finish perfect for springtime celebrations or kids' parties. Chilling before dipping ensures easy handling and a crisp outer shell, while optional color tweaks enhance the pastel appeal.
The kitchen smelled like pure celebration when I first attempted these Easter egg cake pops. My daughter had been begging me to make them after seeing someone post colorful pictures on social media, and I figured how hard could crumbling cake and dipping it in chocolate really be. Spoiler alert: my first batch looked like lumpy misshapen stones rather than cute festive eggs. But three attempts later, I finally got the hang of shaping them, and now they are the most requested treat for every spring gathering we attend.
Last year I made six dozen of these for my nieces Easter birthday party. The best part was watching the childrens eyes light up when they saw the tray of colorful egg pops standing up like little edible sculptures. My sister insisted I teach her the technique right then and there, flour still dusting the counter and chocolate coating our fingers.
Ingredients
- Vanilla or funfetti cake mix: The base becomes your canvas, so choose a flavor you genuinely love eating on its own.
- Cream cheese: Adds tanginess that cuts through the sweetness of the candy coating.
- Unsalted butter: Room temperature is essential here or your frosting will never come together smoothly.
- Powdered sugar: Sift it first to avoid tiny lumps in your finished cake pops.
- Vanilla extract: Pure vanilla makes a noticeable difference in the final flavor profile.
- Candy melts: White gives you a blank canvas, but pastel colors save time on extra decorating steps.
- Vegetable oil: This thins the coating for that smooth professional look without seizing.
- Colorful sprinkles: Pour them into small bowls for easier dipping and better coverage.
- Cake pop sticks: Dip the very tip in chocolate before inserting for a secure hold that will not slip.
Instructions
- Bake and cool the cake:
- Follow the package directions precisely and let the cake cool completely, otherwise you will end up with a gummy mess when trying to crumble it.
- Crumble the cake:
- Use your clean hands to break the cooled cake into fine crumbs in a large bowl, working until no large chunks remain.
- Make the frosting:
- Beat the cream cheese, butter, powdered sugar, and vanilla until completely smooth and fluffy, about 2 minutes on medium speed.
- Combine and shape:
- Add frosting gradually, mixing with your hands until the mixture holds together when pressed, then roll into egg shapes and chill for 30 minutes.
- Melt the coating:
- Melt the candy melts according to the package, stirring in vegetable oil one teaspoon at a time until smooth and pourable.
- Insert the sticks:
- Dip the end of each stick into melted chocolate, insert halfway into each cake egg, then return to the fridge for 10 minutes to set.
- Dip and decorate:
- Working quickly, dip each cake pop into the coating, let excess drip off, immediately add sprinkles, then stand upright to harden completely.
 Save to everydaypinmeals
 These became a tradition after my mom tried to make them for Easter and called me in frustration because all her eggs were sliding down the sticks. I walked her through the proper chilling time and oil ratio over the phone, and the next year she sent me a photo of her perfectly shaped eggs arranged in a cute little basket. Now she texts me every February asking if I want to have a cake pop making day.
Choosing Your Coating
Candy melts are designed specifically for coating, but white chocolate chips work too if you add a teaspoon of coconut oil. The candy melts give you that flawless shell without tempering, which is why I recommend them for beginners. Gel food coloring mixed into white melts creates custom pastels that look professionally done.
Shaping Techniques
The egg shape is all about gentle tapering at the ends. Roll the mixture into a ball first, then use your palms to slightly elongate it, applying gentle pressure to create the rounded egg ends. Keep a small bowl of warm water nearby to dip your hands in if the mixture starts sticking to your fingers.
Storage and Serving
These hold up beautifully for days when stored properly in the refrigerator. Place them in an airtight container with parchment paper between layers to prevent sticking. Let them come to room temperature for about 15 minutes before serving so the coating does not crack when someone takes a bite.
- Wrap individually in clear treat bags tied with ribbon for gift giving
- Stand them in a styrofoam block wrapped in decorative paper for displays
- Make double what you think you need because they disappear faster than regular cake
 Save to everydaypinmeals
 There is something deeply satisfying about biting through that crisp candy shell into the soft, creamy center. These little treats have a way of making ordinary moments feel like celebrations, which is probably why they have earned their permanent spot in my holiday baking rotation.
Recipe FAQs
- → What cake types work best for this treat?
-
Vanilla or funfetti cake mixes provide a light, flavorful base, but chocolate or lemon variations can add nice variety.
- → How do I achieve a smooth coating on the pops?
-
Adding vegetable oil to melted candy melts thins the coating, allowing for easy dipping and a glossy finish.
- → Why chill the shaped cake before dipping?
-
Chilling firms the cake mixture, preventing it from crumbling during dipping and helping the coating set evenly.
- → Can I customize the sprinkles and colors?
-
Yes, using gel food coloring with white candy melts lets you create pastel shades to match any theme or preference.
- → How should these treats be stored?
-
Keep them in an airtight container in the refrigerator for up to five days to maintain freshness and coating texture.