 Save to everydaypinmeals
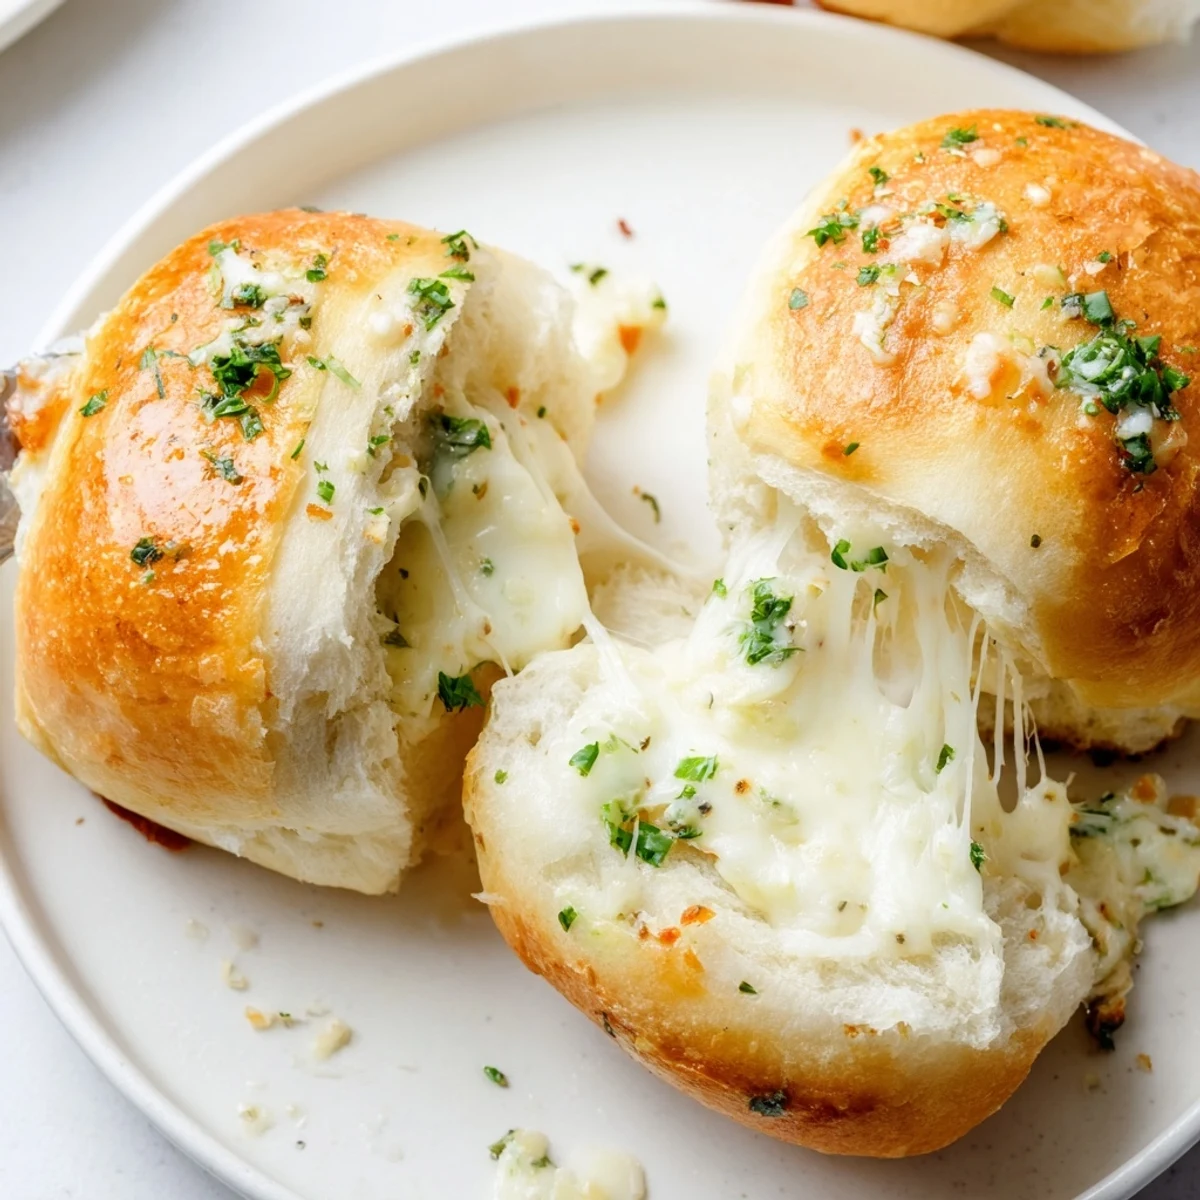
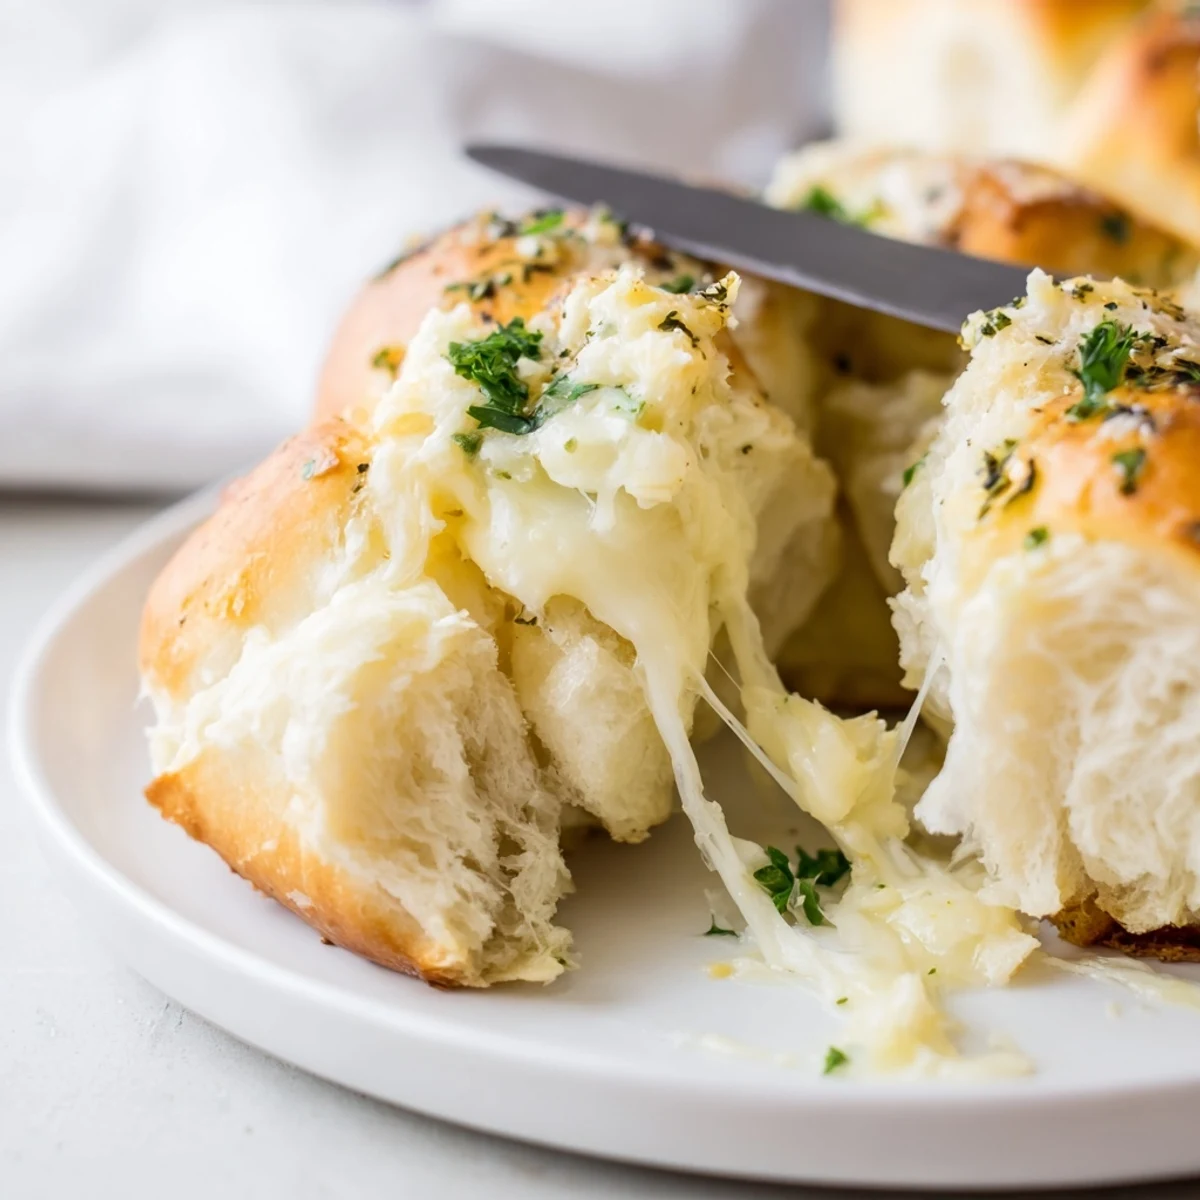
 Make an enriched dough with warm milk, yeast, softened butter and an egg; knead until smooth and let it double (about 1 hour). Divide into 12 pieces, enclose a garlicky butter mix with mozzarella and Parmesan, then let the shaped rolls rise 25–30 minutes. Bake at 180°C (350°F) for 20–25 minutes until golden, then brush with melted garlic butter and sprinkle parsley before serving.
Something about the fragrant cloud that fills the kitchen as garlic hits melted butter always nudges curiosity into hunger, and these cheese-stuffed rolls never failed to have people hovering near the oven. One afternoon, rain drumming against the glass, I reached for what I had on hand—cheese, a knob of butter, and a head of garlic—and found myself kneading away the kind of stress that only carbs cure. The dough felt satisfyingly warm beneath my palms, almost as if it knew good things were coming. Sometimes, recipes write themselves in moments like these.
There was a dinner party where these rolls vanished before plates even touched the table—some friends quietly loading up two at a time, whispering about the cheese pulls as if they'd found hidden treasure. Watching the last one disappear with a sheepish grin, I realized I'd never be allowed to show up empty-handed again. Since then, baking these has become half tradition, half expectation, always greeted with excited anticipation and plenty of napkins. No leftovers is the sincerest form of compliment.
Ingredients
- All-purpose flour: I like using standard flour because it gives perfectly pillowy rolls every time—just be sure to measure it with a light hand to avoid tough dough.
- Active dry yeast: The key to that irresistible puff; I always check for froth to be sure the yeast is lively before moving on.
- Sugar: A tiny spoonful is all you need to feed the yeast and balance the savoriness later.
- Salt: Essential for rounding out flavor—never skip it!
- Warm milk: Not too hot or you’ll anger the yeast; it should feel like a warm bath when you touch it.
- Unsalted butter (for dough & filling): This adds richness and softness, and using unsalted lets you control the saltiness throughout.
- Large egg: The egg makes the rolls tender, especially when combined with butter and milk.
- Garlic: Minced as fine as you can so it melts right into both the filling and the topping—fresh is always worth it here.
- Mozzarella cheese: I prefer shredding my own for meltier, stretchy filling, though pre-shredded does work in a pinch.
- Parmesan cheese: This brings a sharp, nutty edge that cuts through all that richness—crucial for balance.
- Fresh parsley: If you want a bit of herbaceous lift, scatter in chopped parsley for color and freshness, though it’s not a deal-breaker if you skip it.
- Dried Italian herbs: A sprinkle of these adds depth if you’re feeling fancy, but don’t use too much or they’ll overpower the butter and cheese.
Instructions
- Start the Dough:
- Combine warm milk, sugar, and yeast in a large bowl—stand nearby and watch for a cappuccino-thick foam as it comes to life.
- Mix and Knead:
- Add the softened butter, egg, and salt, then slowly mix in the flour; knead by hand or with a dough hook until the dough springs back, leaving a slightly tacky but not sticky feeling on your fingers.
- First Rise:
- Move the dough to an oiled bowl, cover, and tuck it in a warm spot; in about an hour it should double, feeling like a squishy pillow under your fingertips.
- Prepare for Filling:
- Mix together the filling—a swirl of melted butter, minced garlic, cheeses, and herbs—so that each scoop is fragrant and swirled with flavor.
- Shape the Rolls:
- Punch down the dough, divide into 12 pieces, and gently flatten each; drop a generous spoonful of filling in the center, then carefully pinch to seal so no cheese escapes in the oven.
- Second Rise:
- Arrange sealed-side down on a parchment-lined tray, cover loosely, and let them rise one more time until they look slightly puffy, about 25–30 minutes.
- Bake to Gold:
- Bake at 180°C (350°F) for 20–25 minutes, listening for the soft hiss and catching the scent as they turn golden brown on top.
- Finish with Garlic Butter:
- While still hot, brush generously with garlic butter and sprinkle with parsley—a glistening, aromatic final flourish.
 Save to everydaypinmeals
 One snowy Saturday, my little cousin flung flour everywhere as she tried and failed to form perfect dough balls; when she finally got her first cheesy, golden roll from the oven, she bit in and declared herself the queen of garlic bread. Watching her pride in that messy, delicious moment, suddenly these rolls felt like something that connected generations over buttered fingers. It’s the kind of happiness you can’t buy at any bakery. There’s nothing quite like sharing the first warm batch with someone you love.
What to Serve With Buttery Cheese Garlic Rolls
Pairing these rolls is nearly as fun as baking them. Tomato-based soups, hearty pasta bakes, or even crisp salads elevate the garlic and cheese to center stage. Once I brought them as a brunch side, and within minutes, guests started using them to scoop up runny egg yolks—absolute genius. These rolls won’t last long, no matter what they’re alongside.
Make-Ahead and Storage Tips
If you’re planning ahead, assemble rolls up to the second rise and refrigerate overnight, then bake off fresh the next day. They also freeze beautifully—just let them cool completely and stash in airtight bags, then reheat for a few minutes to restore their soft, buttery glory. I once hid a few in the freezer after a party and was unreasonably delighted to rediscover them as midnight snacks. Good luck hiding them from the rest of the household, though.
Troubleshooting and Variations
Too dense? Check your yeast expiry and milk temperature—it can make or break the rise. Don’t be afraid to experiment with a sprinkle of chili flakes or swap in a fancier cheese. Even when a roll splits and cheese bubbles out, it always seems to be the first one snagged from the pan.
- If you have only instant yeast, you can skip proofing and mix everything together—just keep an eye on rise time.
- Try adding a tiny dash of nutmeg to the dough for subtle warmth.
- Cheese leaks in the pan usually mean it’s overstuffed or not sealed tightly—patch tears before baking.
 Save to everydaypinmeals
 I hope you’ll bake these buttery cheese garlic rolls and find joy in each fluffy, savory bite—just be prepared for them to vanish quickly. Share them warm and watch everyone’s faces light up.
Recipe FAQs
- → How do I avoid soggy centers?
-
Seal each ball tightly so the filling is enclosed and not wet at the seams. Use melted but not pooling butter in the filling and avoid overfilling. Bake until golden and check a couple of rolls in the center to ensure the dough is cooked through.
- → Can these be frozen and reheated?
-
Yes. Freeze baked rolls fully cooled in an airtight container for up to 2 months; reheat in a 160°C (325°F) oven until warmed through. For freezing before baking: freeze shaped rolls on a tray, then transfer to a bag; thaw, let complete the final rise, and bake as directed.
- → What cheeses can I substitute for mozzarella and Parmesan?
-
Good swaps include fontina, provolone, cheddar or young gouda for meltiness; combine an aged cheese like Asiago or pecorino for a sharper finish. Adjust salt levels when using saltier varieties.
- → How can I get a shinier, more golden crust?
-
Brush with an egg wash (1 beaten egg + 1 tbsp water) before baking for a glossy, deep-golden crust. For a softer, buttery finish, brush with melted butter right after baking instead.
- → Is a stand mixer safe for the dough?
-
Yes. Use a dough hook at low to medium speed and knead 4–6 minutes until the dough is smooth and elastic. Stop occasionally to check texture—dough should be tacky but not sticky.
- → How can I add a spicy kick?
-
Mix a pinch of chili flakes or finely diced fresh chili into the garlic-butter filling, or sprinkle a few flakes on top after brushing with the finishing butter for a subtle heat.