 Save to everydaypinmeals
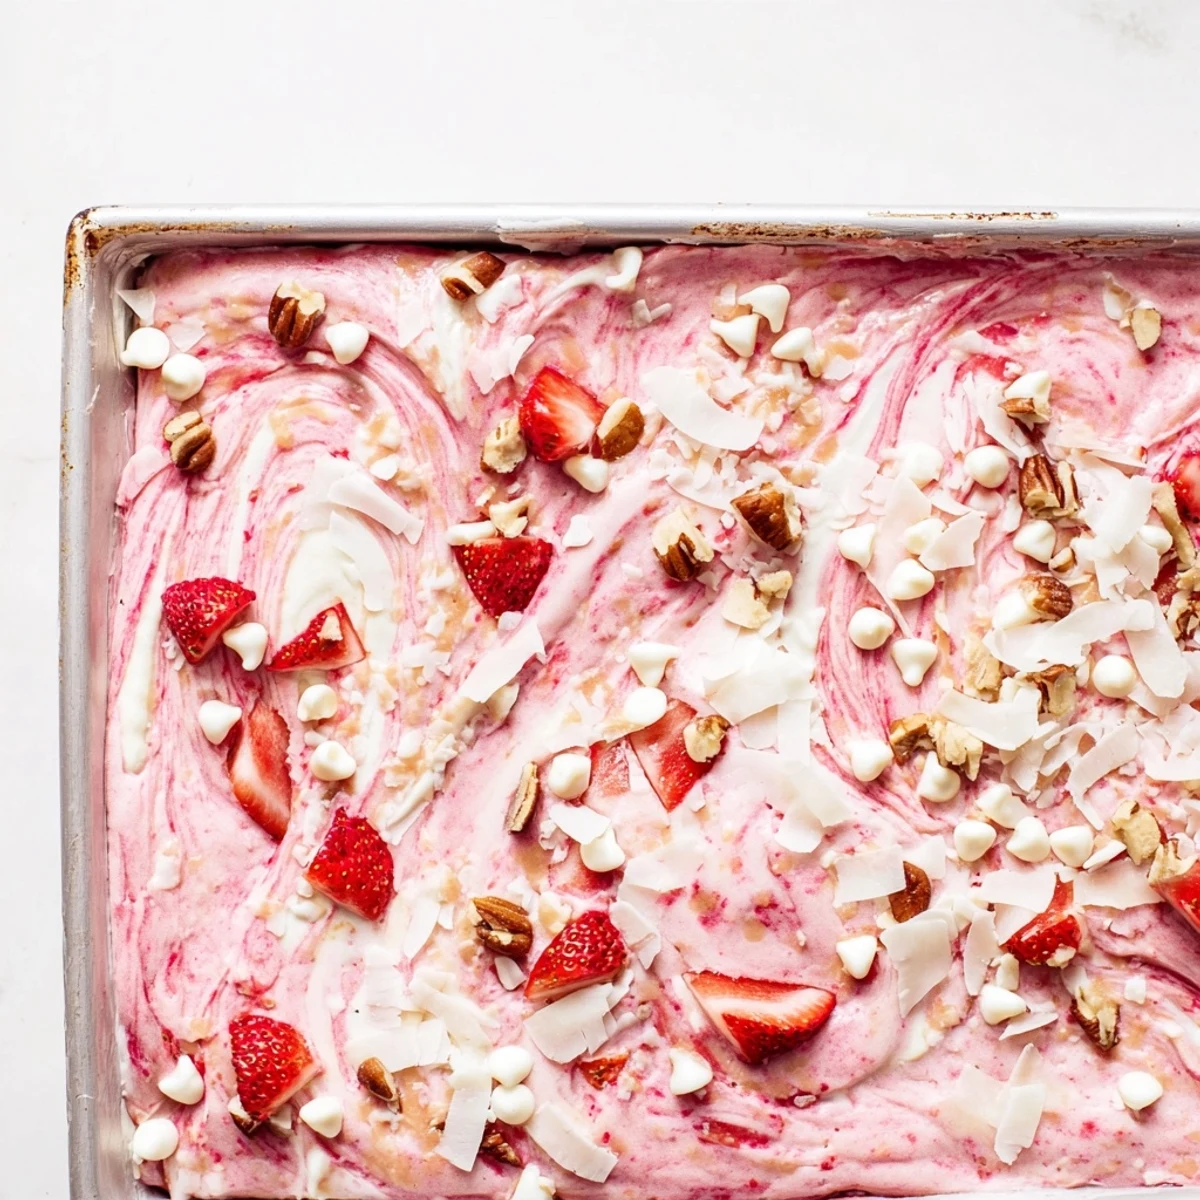
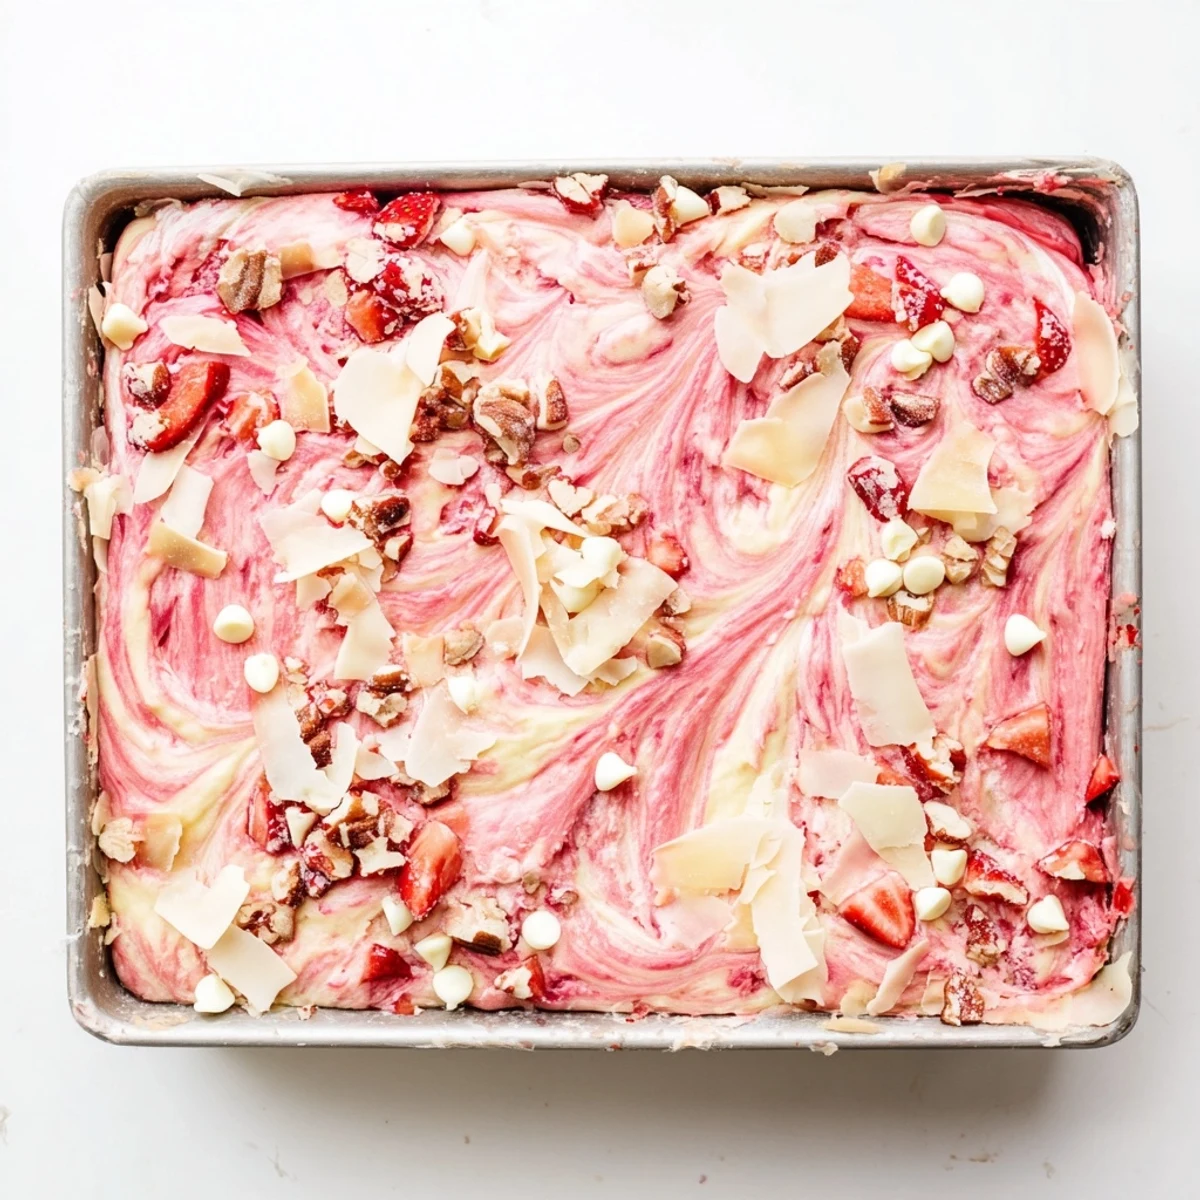
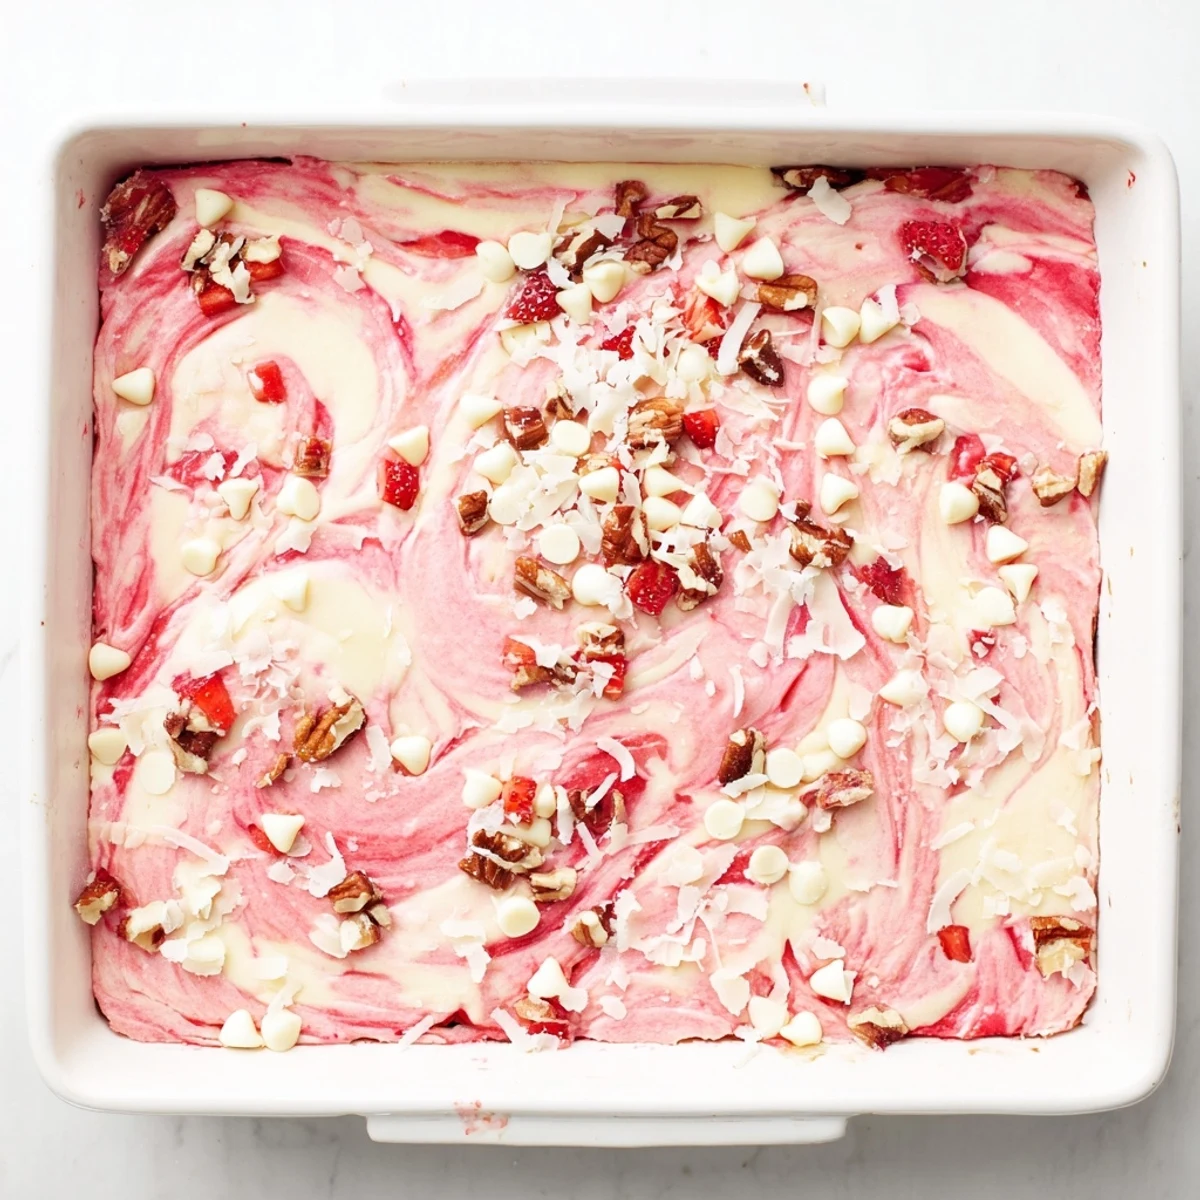
 This luscious dessert starts with a tender strawberry cake base, topped with generous dollops of sweetened cream cheese mixture. The magic happens when you swirl the two together, creating beautiful ribbons of creamy filling throughout the batter. White chocolate chips and fresh strawberry pieces get sprinkled across the top before baking, resulting in a wonderfully marbled, slightly cracked masterpiece.
The contrast between the moist cake, tangy cream cheese, melted white chocolate, and juicy fruit creates an incredible depth of flavor in every bite. Optional coconut and nuts add delightful texture variation.
Last summer my daughter spotted this recipe on my phone screen and immediately announced we needed earthquake cake for her birthday. I'd never heard of it before, but something about the messy swirled appearance made both of us giggle, and suddenly there was no turning back. The whole kitchen filled with that unmistakable strawberry scent while it baked, which only made the wait more impossible. When we finally cut into it, that gorgeous marbled cream cheese ribbon running through pink cake looked like absolute chaos in the best possible way.
My sister in law actually texted me at midnight the first time I made this, demanding to know what I'd brought to the potluck because she couldn't stop thinking about it. I'd set it on the dessert table between some very respectable brownies and a perfectly composed tart, but this cake with its cracked uneven surface disappeared first. There's something about that casual undone appearance that makes people instantly comfortable, like it's okay to reach for seconds because nobody's trying to impress anyone.
Ingredients
- Strawberry cake mix: The foundation here, and honestly the strawberry flavor plays so nicely against the tangy cream cheese layer
- Large eggs: Room temperature eggs will incorporate more evenly into your batter
- Vegetable oil: Keeps the cake incredibly moist and tender
- Water: Though milk makes it richer, water works perfectly fine and keeps it lighter
- Cream cheese: Must be completely softened or you'll end up with stubborn lumps in your filling
- Unsalted butter: Let this soften alongside your cream cheese so everything blends seamlessly
- Powdered sugar: Sweetens and thickens the cream cheese layer into something spreadable
- Vanilla extract: Pure vanilla makes a noticeable difference here
- White chocolate chips: These melt slightly into the crevices and create these amazing pockets of sweetness
- Fresh strawberries: Chop them into small pieces so they distribute evenly
- Sweetened shredded coconut: Completely optional but adds such lovely texture and flavor
- Chopped pecans or walnuts: Another optional add in that brings welcome crunch
Instructions
- Preheat your oven and prep the pan:
- Set your oven to 350°F and grab a 9x13 inch baking dish, greasing it thoroughly so nothing sticks later.
- Mix up the strawberry cake batter:
- Dump your cake mix into a large bowl with eggs, oil, and water, then beat it all until everything's smoothly combined.
- Spread the cake batter:
- Pour that lovely pink batter into your prepared dish and spread it into an even layer with your spatula.
- Make the cream cheese filling:
- In another bowl, beat your softened cream cheese and butter until they're completely smooth, then add powdered sugar and vanilla and keep beating until it's creamy.
- Drop dollops everywhere:
- Scoop spoonfuls of that cream cheese mixture randomly over the top of your cake batter.
- Swirl it together:
- Run a knife through everything in gentle figure eights, being careful not to overmix because you want distinct marbled ribbons.
- Scatter all the toppings:
- Sprinkle your white chocolate chips, chopped strawberries, coconut, and nuts across the surface however looks good to you.
- Bake until set:
- Slide it into the oven for 40 to 45 minutes until edges are golden and the center is mostly set, though a few moist crumbs on your tester is perfect.
- Let it rest before serving:
- Cool for at least 30 minutes in the pan because the filling needs time to set up or it'll be too loose.
 Save to everydaypinmeals
 My grandmother always said the best desserts are the ones that look like someone actually made them, and this cake is exactly that kind of wonderful imperfection. Every time I serve it now, someone inevitably asks about the earthquake name and laughs when I explain it's supposed to look like a disaster zone. There's something freeing about baking something that's supposed to be messy, like you can't possibly get it wrong.
Making It Your Own
I've tried swapping in different cake mixes and chocolate cake with this same method is absolutely ridiculous, especially with dark chocolate chips scattered on top. Lemon cake works beautifully too, and the cream cheese filling balances that bright citrus flavor perfectly. Raspberry cake mix exists in some stores and would be stunning here.
Serving Suggestions
This cake needs to be served slightly warm or at room temperature because the cream cheese layer firms up too much when cold. I've learned to plan for about 30 minutes of cooling time before serving, which also happens to be exactly when it's easiest to cut clean squares. A dollop of whipped cream on each plate never hurt anyone either.
Storage and Make Ahead Tips
This cake actually tastes even better on day two when all those flavors have had time to mingle properly. Store it covered at room temperature for up to three days, though in my house it never lasts that long anyway.
- You can assemble everything up to the baking step and refrigerate overnight, then bake when needed
- Freeze individual squares wrapped tightly for up to two months if you somehow have leftovers
- The cream cheese layer might weep slightly if refrigerated too long, so room temperature is best
 Save to everydaypinmeals
 Every time I pull this cake from the oven, I'm still amazed that something so deliberately imperfect can taste so absolutely perfect. Maybe that's the real secret.
Recipe FAQs
- → Why is it called earthquake cake?
-
The name comes from its characteristic cracked, uneven appearance after baking. As the cream cheese mixture settles and the cake rises, it creates beautiful fissures and crevices across the surface, resembling earthquake terrain.
- → Can I make this dessert ahead of time?
-
Absolutely! This treat tastes even better after resting for a day. Bake, cool completely, cover tightly, and store at room temperature for up to 3 days. The flavors develop beautifully and the texture remains wonderfully moist.
- → What's the best way to achieve proper marbling?
-
Use a butter knife or thin skewer to make figure-eight motions through the batter. Don't over-swirl—just 3-4 gentle passes will create stunning ribbons while keeping distinct layers of cream cheese and cake.
- → Can I use fresh strawberries instead of cake mix?
-
The cake mix provides the ideal structure for this style of dessert. However, you can enhance strawberry flavor by adding fresh strawberry puree to the batter or folding in extra chopped berries before baking.
- → Should this be served warm or cold?
-
Both ways are delicious! Warm servings emphasize the gooey cream cheese and melted white chocolate. Room temperature lets the flavors shine and makes cutting cleaner slices easier.
- → How do I know when it's done baking?
-
The edges should turn golden brown and pull slightly from the pan sides. A toothpick inserted near the center may still show moist crumbs—this is perfect. Avoid overbaking, which would dry out the creamy pockets.