Save to everydaypinmeals
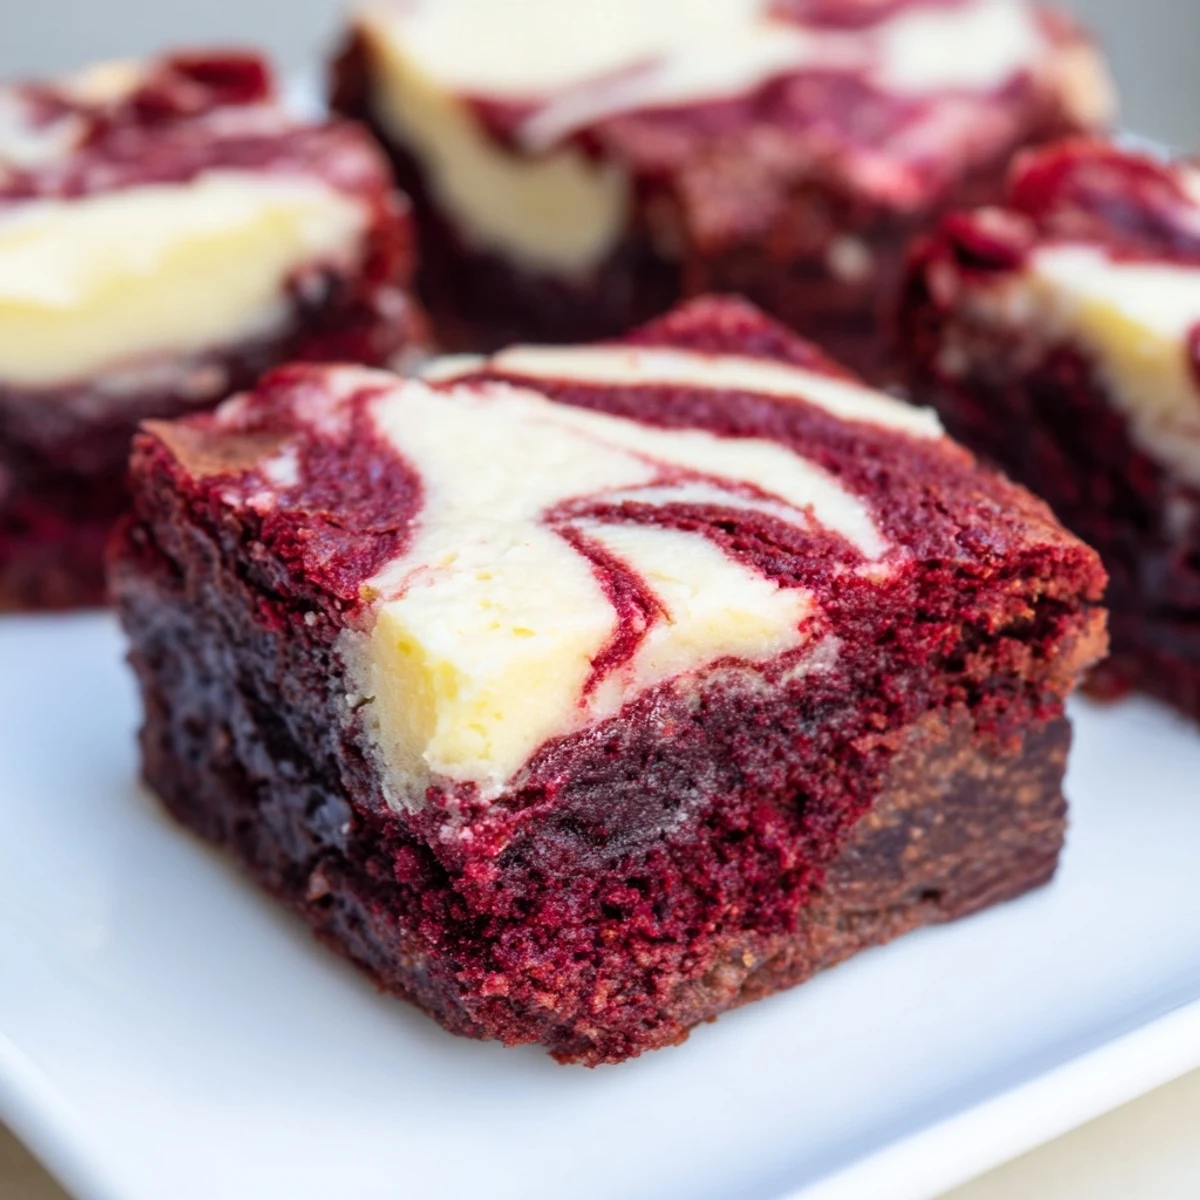
 These indulgent red velvet brownie bites combine rich, fudgy chocolate with tangy cream cheese swirls for an elegant dessert. Ready in just 45 minutes, these bite-sized treats feature a striking marbled appearance and irresistible texture.
The process begins with a simple batter blending butter, sugar, and red food coloring, then enhanced with cocoa powder. The creamy swirl adds luxurious contrast, creating beautiful patterns as it bakes.
Perfect for celebrations or afternoon treats, these brownie bites offer restaurant-quality presentation with minimal effort. The moist interior and slightly crisp edges provide satisfying texture in every bite.
The first time I made these for a Valentine's Day party, my friend Sarah literally hugged me. She said she'd been dreaming about red velvet anything for weeks but was intimidated by making a full cake from scratch.
Last Christmas I accidentally doubled the cream cheese swirl layer because I misread my own scribbled recipe notes. Honestly it was the best mistake ever and now I always make extra swirl.
Ingredients
- Unsalted butter: Melt it gently so it cools slightly before mixing or you might scramble your egg
- Red food coloring: Gel coloring gives you that dramatic red without adding extra liquid to your batter
- Cream cheese: Leave it out for at least an hour so it blends into a silky smooth swirl
- Cocoa powder: Sift it first to avoid those frustrating little lumps in your finished brownies
Instructions
- Get your oven ready:
- Preheat to 350°F and line that mini muffin tin because nobody wants to scrub baked-on brownie bits for twenty minutes after eating dessert
- Make the red velvet magic:
- Whisk your melted butter and sugar until smooth then add in your egg vanilla and red food coloring until everything turns that gorgeous vibrant shade
- Add the dry ingredients:
- Sift in your flour cocoa powder and salt then fold everything together just until no dry streaks remain
- Whip up the swirl:
- Beat together your softened cream cheese sugar egg yolk and vanilla until its completely smooth and dreamy
- Layer it up:
- Spoon one tablespoon of brownie batter into each cup then top with a teaspoon of that luscious cream cheese mixture
- Create the marble:
- Take a toothpick and gently swirl through both layers just once or twice being careful not to overdo it
- Bake to perfection:
- Slide them in for 23 to 25 minutes until the centers are set and a toothpick comes out with just a few moist crumbs
- Let them cool:
- Wait ten minutes in the pan then move them to a wire rack or the bottoms will get soggy which is honestly sad
 Save to everydaypinmeals
 My mom now requests these for every family gathering instead of her famous chocolate cake. I think she just likes that she can pop five of them without anyone noticing.
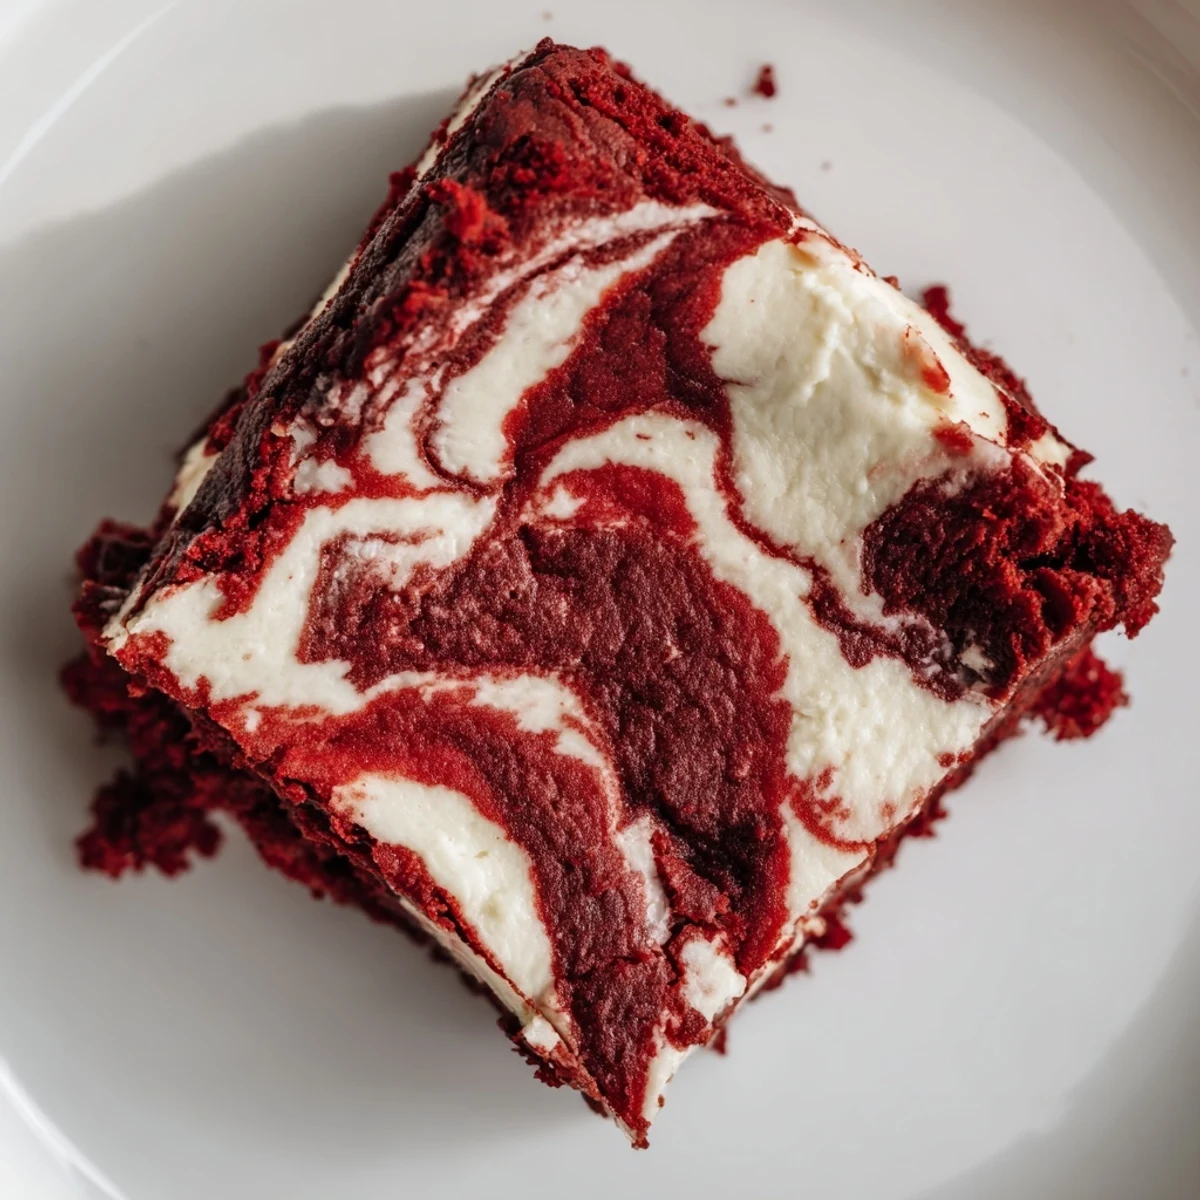
Getting That Perfect Swirl
The trick is barely touching the cream cheese layer with your toothpick. One gentle circle through the center creates that marble effect without mixing the two layers completely together.
Making Them Ahead
These actually taste better the next day when the flavors have had time to meld together. Store them in the refrigerator and bring to room temperature for twenty minutes before serving.
Customization Ideas
These are incredibly forgiving and you can switch up the flavors based on your mood. Sometimes I add white chocolate chips to the batter or sprinkle crushed candy canes on top for Christmas.
- Add a handful of chocolate chips to the brownie batter for extra richness
- Swap red food coloring for any color to match holidays or party themes
- Top each bite with a single raspberry before baking for a fancy touch
 Save to everydaypinmeals
 These little bites have become my go-to dessert for everything from book clubs to birthday parties. They make everyone feel special without requiring hours of work.
Recipe FAQs
- → How do I achieve the perfect marble effect?
-
Gently swirl the cream cheese mixture into the brownie batter using a toothpick or skewer. Avoid over-swirling, which can muddy the distinct marble pattern. A simple figure-eight motion works beautifully.
- → Can I make these ahead of time?
-
Absolutely! These brownie bites store well in an airtight container in the refrigerator for up to 4 days. The flavors actually develop and intensify after a day, making them excellent for party prep.
- → What's the best way to tell when they're done baking?
-
Insert a toothpick into the center—it should come out with moist crumbs rather than wet batter. The tops should appear set with a slight jiggle in the center. Avoid overbaking to maintain fudgy texture.
- → Can I freeze these brownie bites?
-
Yes! Allow them to cool completely, then freeze in a single layer before transferring to a freezer-safe container. They'll keep for up to 3 months. Thaw overnight in the refrigerator or at room temperature for 1-2 hours.
- → How can I intensify the red color?
-
Use gel food coloring instead of liquid for more vibrant results. Start with 1 tablespoon and add more as needed. Gel coloring provides deeper color without adding excess liquid to the batter.
- → What type of cocoa powder works best?
-
Natural unsweetened cocoa powder delivers the classic red velvet flavor. Dutch-processed cocoa can be used but may result in a darker color. For deeper chocolate notes, increase cocoa to 3 tablespoons.