 Save to everydaypinmeals
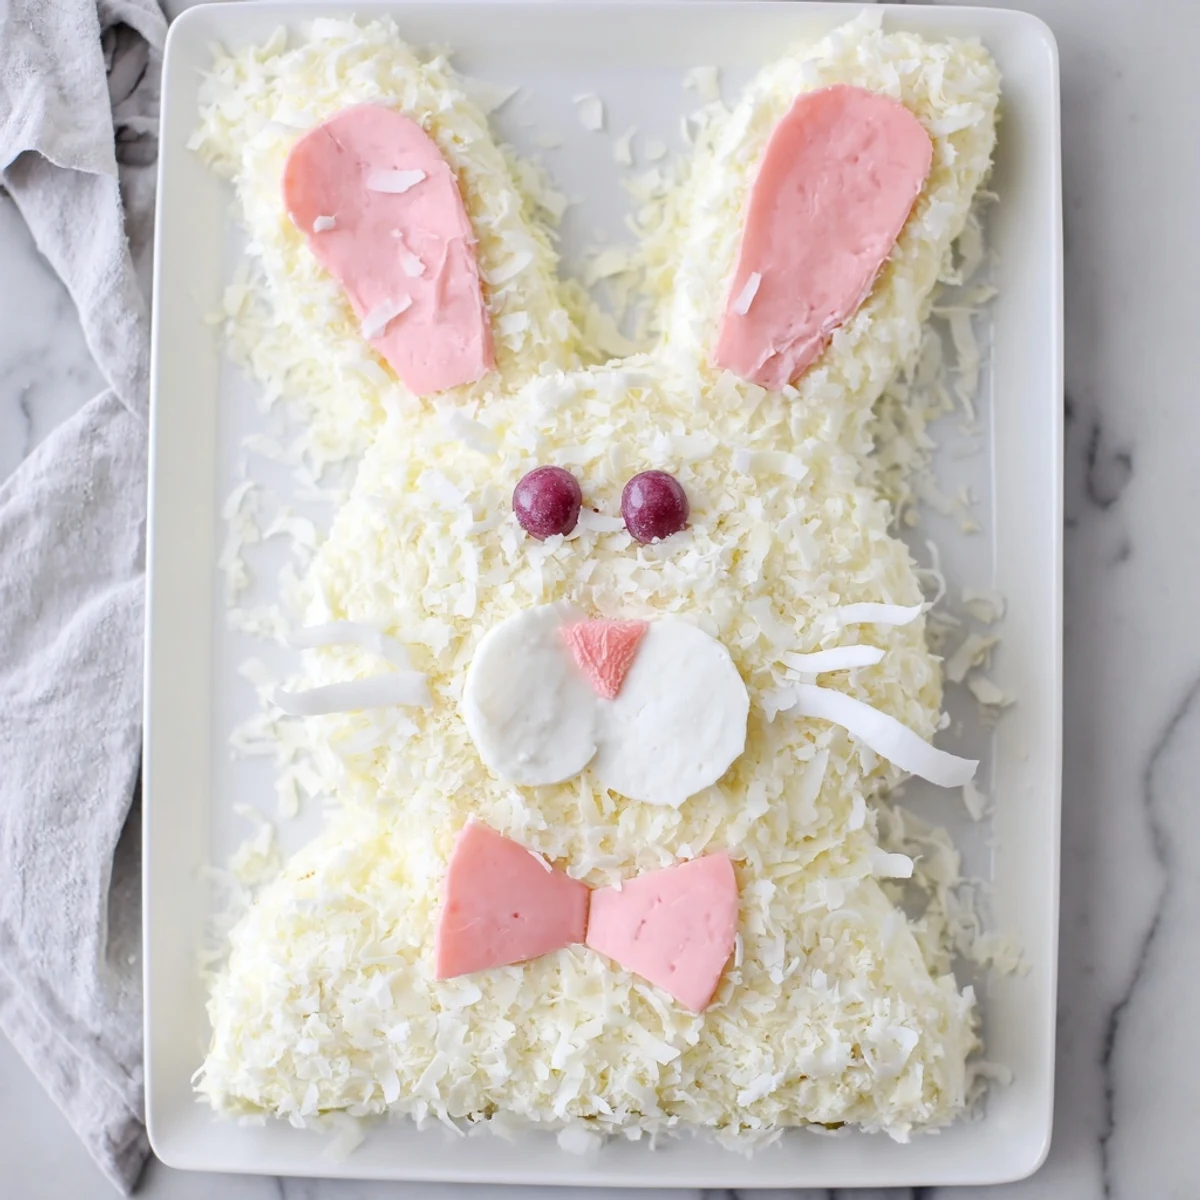
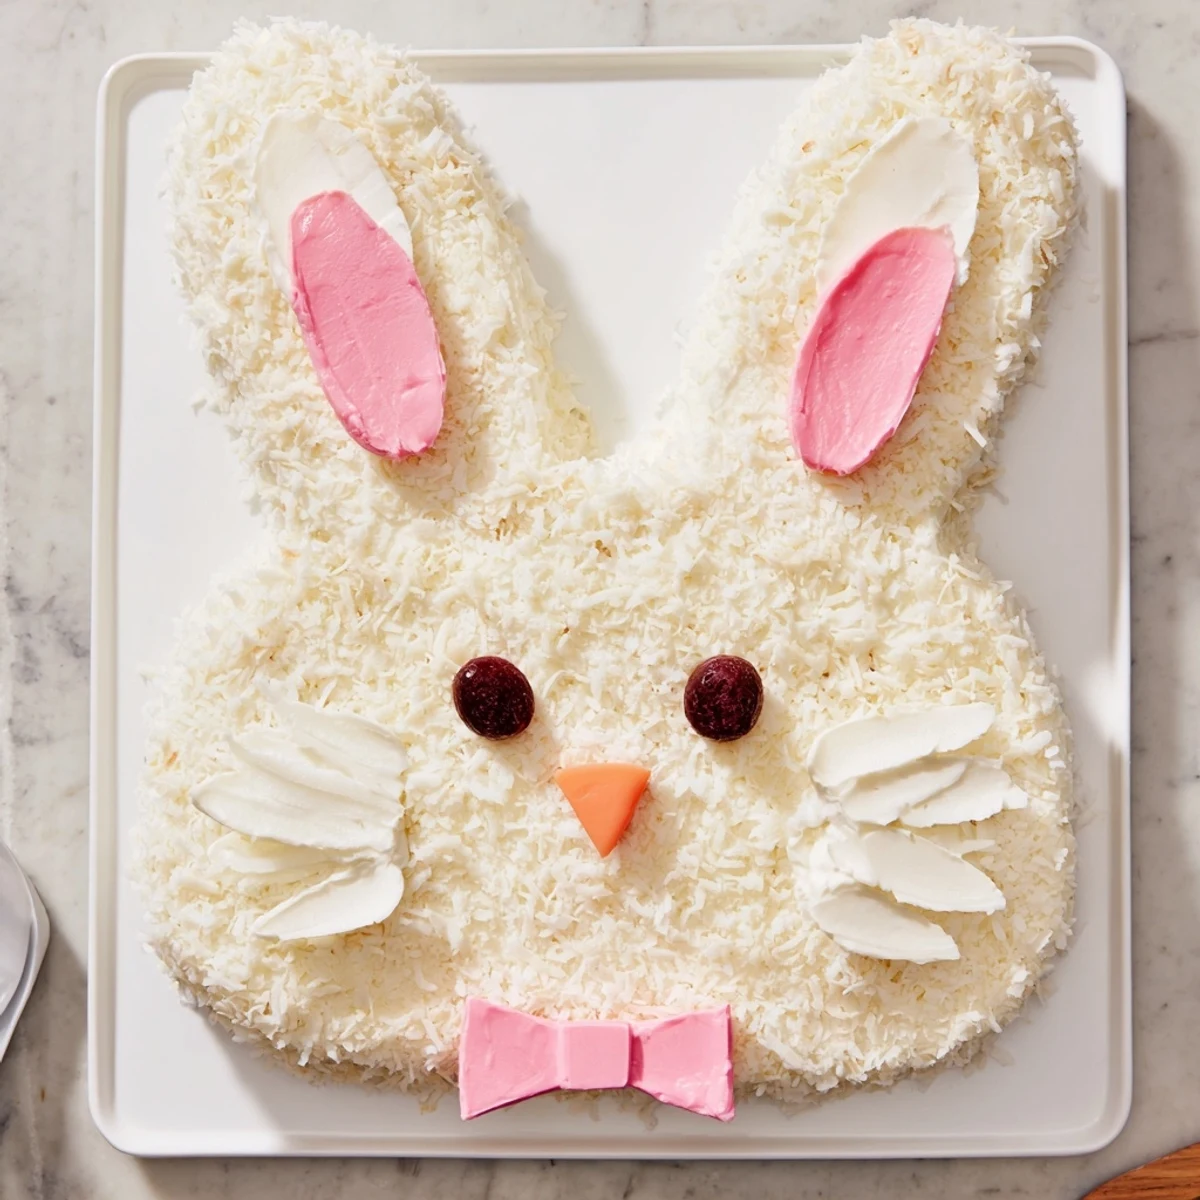
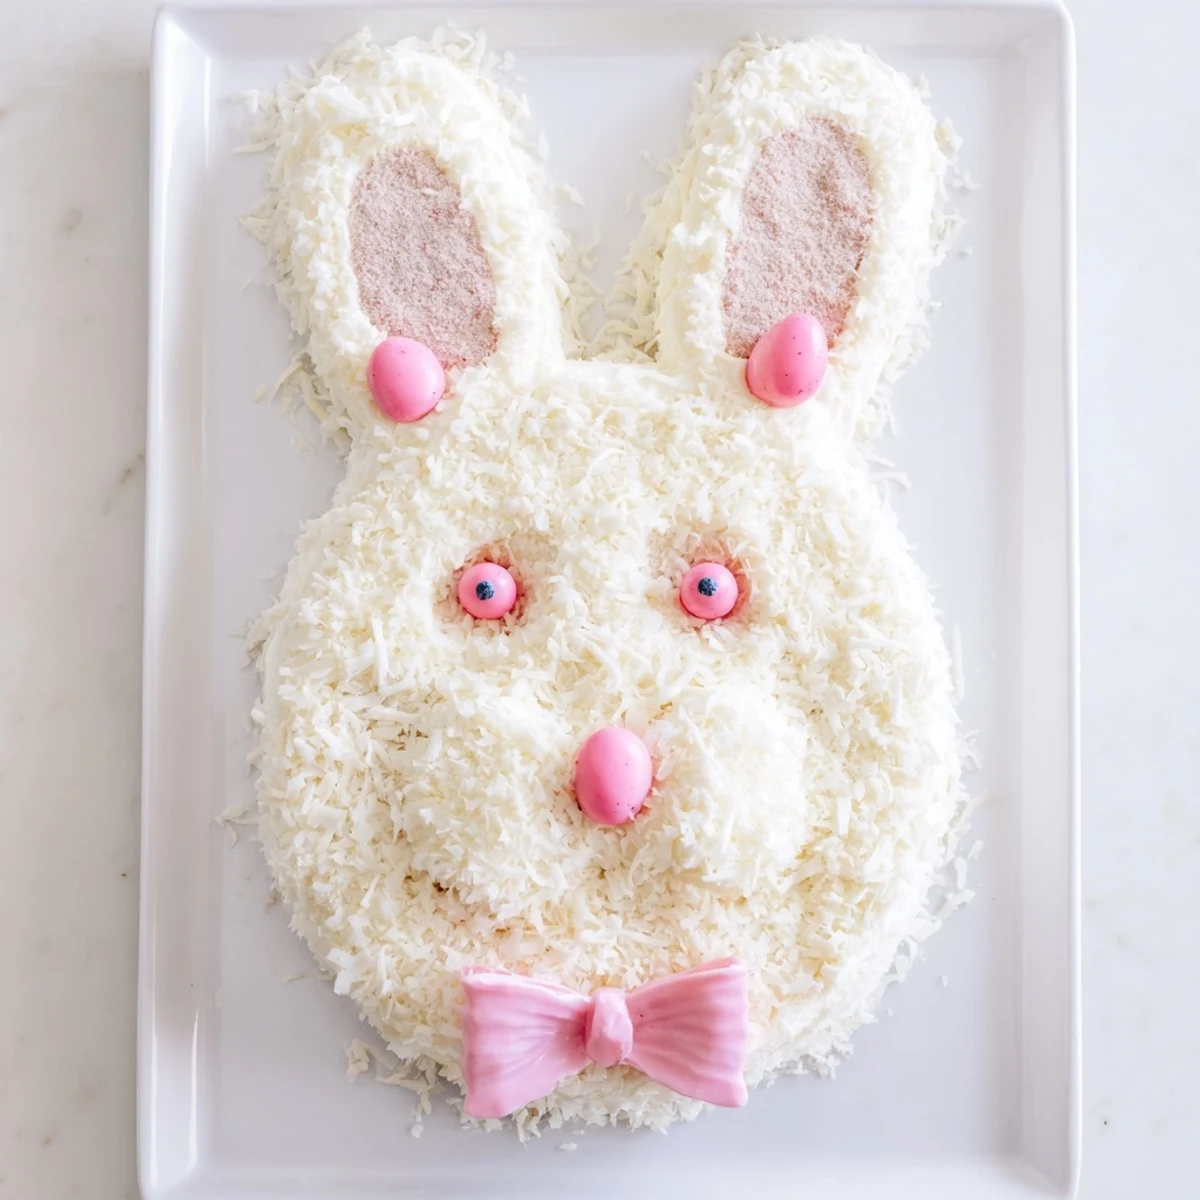
 This charming bunny-shaped dessert brings whimsy to any spring table. Start with moist vanilla cake layers baked in round pans, then assemble into an adorable bunny face with floppy ears and bow tie. The entire creation gets coated in creamy vanilla buttercream and rolled in shredded coconut for fluffy fur texture. Pink-tinted coconut creates delicate inner ears, while jelly beans and fondant add the finishing touches with eyes, nose, and whiskers. The result is both visually stunning and delicious, making it an ideal centerpiece for Easter brunch or spring parties.
The first time I attempted this bunny cake, my kitchen looked like a coconut explosion. I was trying to surprise my niece for her Easter birthday, and somewhere between the food coloring and the shredded coconut mess, I realized the imperfections were what made it charming. Now it is become our family is most requested spring dessert.
Last spring, my neighbor is daughter walked in while I was arranging the bunny ears and her gasp of delight was better than any compliment. Kids and adults alike get genuinely excited about this cake, and the way coconut creates that fluffy fur texture transforms something simple into something magical.
Ingredients
- All-purpose flour: The foundation of tender cake layers, measure by weight if possible for consistent results
- Baking powder and baking soda: Both leavening agents work together to give the cake its rise and light texture
- Salt: A small amount balances the sweetness and enhances all the other flavors
- Granulated sugar: Sweetens the cake while creating a tender crumb and golden edges
- Unsalted butter: Room temperature butter creams properly and adds rich flavor to both cake and frosting
- Large eggs: Bind the ingredients together and add structure, use them at room temperature for better emulsification
- Whole milk: Adds moisture and fat for a tender crumb that stays fresh longer
- Vanilla extract: Pure vanilla extract makes all the difference in both cake and buttercream frosting
- Powdered sugar: Sifting first prevents lumps in your frosting and creates silky smooth results
- Sweetened shredded coconut: Creates that adorable fluffy fur texture and adds subtle sweetness throughout
- Pink food coloring: A tiny drop transforms plain coconut into blushing bunny cheeks and inner ears
- Jelly beans or mini candies: The finishing touches that bring your bunny to life with personality
- Pink and white fondant or marshmallows: Shape these into floppy ears that stand up and stay put
Instructions
- Preheat your oven and prepare the pans:
- Heat your oven to 350°F and generously grease two 8-inch round pans with butter, then dust with flour, tapping out any excess
- Whisk the dry ingredients together:
- In a medium bowl, combine the flour, baking powder, baking soda, and salt until well blended
- Cream the butter and sugar:
- Beat the softened butter and granulated sugar in a large bowl until pale and fluffy, about 3 minutes
- Add the eggs and vanilla:
- Beat in the eggs one at a time, fully incorporating each before adding the next, then mix in the vanilla
- Combine wet and dry ingredients:
- Alternate adding the flour mixture and milk to the butter mixture, starting and ending with flour, mixing until just combined
- Bake the cake layers:
- Divide the batter evenly between the prepared pans and bake for 22 to 25 minutes until a toothpick comes out clean
- Cool the cakes completely:
- Let the cakes rest in their pans for 10 minutes, then turn them out onto wire racks to cool entirely before frosting
- Make the buttercream frosting:
- Beat the softened butter until smooth, then gradually add powdered sugar, vanilla, salt, and enough milk for spreadable consistency
- Shape your bunny pieces:
- Leave one cake round whole for the face, cut the second round into two ovals for ears, and trim the remaining center into a bow tie
- Arrange the bunny on your serving tray:
- Position the face round in the center, place the ears above at an angle, and set the bow tie below
- Apply a crumb coat:
- Spread a thin layer of frosting over all the cake pieces to lock in crumbs, then chill for 20 minutes
- Add the final coat of frosting:
- Frost the entire bunny generously with the remaining buttercream, working quickly while the cake is still chilled
- Create the coconut fur:
- Press handfuls of shredded coconut gently over the frosted surface, covering all exposed buttercream completely
- Add the pink details:
- Tint a small handful of coconut with one drop of pink food coloring, then press it onto the inner ear sections
- Finish with bunny features:
- Use fondant or marshmallows for the ears, then place candies for the nose and eyes, completing your adorable centerpiece
 Save to everydaypinmeals
 My sister now requests this cake for every spring gathering, and watching her kids help decorate the bunny face has become its own tradition. Something about a dessert that makes people smile before they even take a bite feels special.
Making It Your Own
Chocolate cake works beautifully with this design, and the dark contrast against white coconut looks striking. I have also used lemon cake with tinted coconut for a pastel variation that feels like spring on a plate.
Decorating Without Stress
The beauty of this cake is that the coconut hides any frosting imperfections. If your buttercream is not perfectly smooth, nobody will know once that fluffy coconut layer goes on.
Storage And Serving Tips
This cake keeps beautifully covered at room temperature for two days, though the refrigerator extends it to four. The coconut does soften slightly when chilled, so bring it to room temperature 30 minutes before serving for the best texture.
- Use an offset spatula for the smoothest frosting application
- Press coconut onto the sides of the cake first, then finish the top
- Place candies just before serving so they do not bleed color into the frosting
 Save to everydaypinmeals
 There is something wonderful about serving dessert that makes people lean in closer and smile. This bunny cake brings that joy to the table every single time.
Recipe FAQs
- → How far in advance can I make this?
-
You can bake the cake layers up to 2 days ahead and store them wrapped in plastic at room temperature. The fully assembled dessert stays fresh covered at room temperature for 2 days or refrigerated for up to 4 days. Add coconut and decorations on the day of serving for the best texture and appearance.
- → What if I don't have fondant for the ears?
-
Marshmallows work beautifully as an alternative. Simply cut large marshmallows in half diagonally to create ear shapes, or use pink and white candy melts. You could also shape pink modeling chocolate or even use colored cardstock as decorative picks if not consuming directly.
- → Can I make this gluten-free?
-
Yes, substitute the all-purpose flour with a 1-to-1 gluten-free flour blend that includes xanthan gum. Ensure your baking powder, vanilla extract, and all decorations are certified gluten-free. The texture remains moist and delicious, though the crumb may be slightly more tender.
- → How do I cut the cake to create the bunny shape?
-
Leave one round layer intact for the face. Cut the second round in half lengthwise to create two long oval ears. Trim the remaining curved scraps into a bow tie shape. Arrange all pieces on a large serving platter before frosting to ensure proper placement. Use a serrated knife for clean cuts through the cooled cake.
- → Can I use different frosting flavors?
-
Absolutely. Cream cheese frosting adds tangy sweetness that pairs wonderfully with vanilla cake. Chocolate frosting creates a fun contrast with the white coconut fur. For a lighter option, try stabilized whipped cream or Swiss meringue buttercream. Just ensure your chosen frosting has enough structure to hold the coconut coating.
- → What's the best way to tint coconut pink?
-
Place a small amount of shredded coconut in a ziplock bag and add 1-2 drops of pink food coloring. Seal the bag and massage gently until the color is evenly distributed. Add more coloring drop by drop for deeper pink shades. Spread the tinted coconut on a paper towel to dry slightly before applying to prevent color bleeding.